The Science, Methodology, and Philosophy of Making Snow
Author: Oliver S.
Introduction
The long-awaited blog post about snowmaking has arrived. I often get the question, “it’s below freezing... why aren’t we making snow?” There is a lot that goes into that answer and so this post is an attempt to help all of you understand some of the science and process of snowmaking, but also Bromley’s philosophy behind when and where we make snow. This article is divided into 3 sections; the first is the science, the second is the process (methodology), and the third is the mountain’s plans and philosophy. So here it goes...
Science + Numbers

First and foremost, we need to understand the difference between “dry bulb” and “wet bulb” temperatures. There is a lot of complicated meteorology that goes into calculating these, but the simplified version is that the “dry bulb” is the ambient temperature... or the temperature of the air. When you go to look at your weather apps you will see this temperature displayed. For example, my weather channel app says that it will be 28 degrees today; that is the dry bulb or the air temperature. The wet bulb takes into consideration what is called the “adiabatic process.” In short; the adiabatic process is the contrast between high and low pressures in the atmosphere that force air particles upward or downward. This results in upward-moving air particles cooling down and downward-moving particles warming up. The wet bulb temperature calculations take the adiabatic process into account along with the relative humidity. Wet bulb temperatures are always the same or colder than the dry bulb temperatures. An easy way to think of it is the temperature in which freezing is more likely to occur. It is this that affects us when it comes to snowmaking. As the humidity of the air increases, the rate of evaporation decreases, thus giving us a higher wet bulb temperature resulting in more difficulty getting water to freeze. In summary... the more humid it is, the harder it is for water particles to freeze.
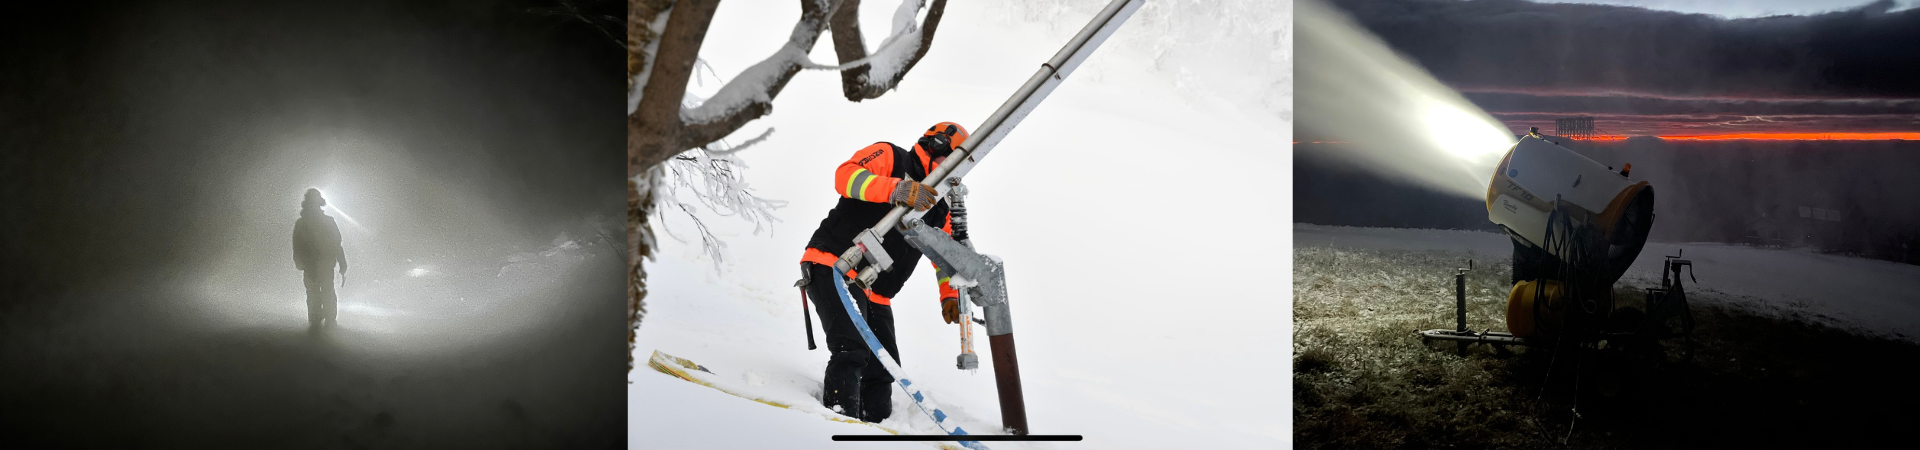
The way that snowmaking occurs is through a highly pressurized air-and-water combination that occurs in the snow gun. There are many different types of snow guns (explained further down) but they all generally do the same thing. When the hoses are attached and a water hydrant is opened, water pressurizes at anywhere from 400-700 PSI into the snow gun. It then escapes through small nozzles that further pressurize the water causing them to break apart. When combined with 87-91 PSI of air, it propels these tiny water droplets outward and the sudden release of pressure (once it escapes the snow gun) expels heat thus cooling these droplets down. This combination occurs in what is called a nucleator nozzle. The droplets then have anywhere from 2-10 seconds to cool further and freeze (crystalize) before reaching the ground. This is why wet bulb is so important to snowmaking because with a higher evaporation rate, the faster the cooling occurs once these droplets exit the nozzles of the snow gun. Fan guns are a little different because they do not use high-pressure air from the pipeline to combine with the water. Instead, they have on-board air compressors that pressurize the air. The huge fan then propels the droplets much further into the air allowing for a much greater drop-time. Fan guns can pump out up to twice the amount of water than a single typical snow gun. The only drawback is that they require electricity, so there needs to be power strategically placed throughout the mountain for them to be used.
To begin making snow, we need to pump water from the reservoir down below the parking lot. The beautiful part of our snowmaking reservoir is that it is completely self-sufficient. Whatever water that we pump up the hill, also has proper drainage back into the reservoir and down into the valley through safe water drainage routes. When the reservoir maxes out in water level it has a drain that ensures we are protecting the wildlife around us and are not changing the surrounding ecosystem.
Once the pumps turn on the discharge pressure is about 700 PSI from the primary pumphouse. For every foot of elevation the water is pumped, it loses about ½ a PSI of pressure. So, once it reaches mid-mountain it is at about 400ish PSI. That is where we activate the booster pumps to give it the extra push up to the summit so that we can maintain that high water pressure. If you do the math, that means if all pumps are on, we can max out anywhere from 2800 GPM to 3100 GPM, this of course depends on how high in elevation we intend to make snow. If we are isolated to the lower half of the mountain, there is less elevation gain, thus resulting in less pressure loss, increasing the amount we can flow without losing hill pressure.
Methodology
In order to begin snowmaking, the first order of business is turning on the air compressors and pressurizing (charging) all of the air pipelines to about 90 PSI. As that is occurring, we fire up the pumps from the primary pumphouse and begin to discharge water up the hill. This water gets sent up the mountain on what’s called an “up-line.” We have 2 up-lines from the primary pumphouse to the mid-mountain booster station. From the mid-mountain booster station, we have 2 more up-lines to the summit of the mountain. These pipelines have water moving upward through them whenever we make snow. From these 4 pipelines, we can pressurize or “charge” other pipelines through valves (that’s right, not all pipes have water in them when we make snow).
When we send water up the mountain the pipelines are empty and drained from the last time we made snow. The draining of the entire mountain when we shut down is crucial toward the success of making snow because it ensures that our pipes do not freeze and cause a blockage. When initially sending water up the mountain through these up-lines we must open hydrants at the end of the pipeline to ensure that we are “pushing air.” “Pushing air” is when the air that replaced the water when draining the mountain is now pushed out of the pipeline as it is replaced with water being pumped from the primary pumphouse. “Pushing air” is also essential for making snow because if you do not let the air escape, you are creating an extremely high-pressurized environment. Then, as the air gets squeezed between the water and the end of the pipeline, it could result in the exploding of the pipeline. Enough of the scary stuff though, once we get water at the end of the pipeline, we “back-pressure” and set up the first snow gun called a “deadhead” (shoutout Grateful Dead). This ensures that we always have water flowing through the entire length of the pipeline which prevents freezing. Once we have charged the up-lines we can then charge subsequent pipelines on the trails that we wish to make snow on. Just copy and paste the process of “pushing air” and setting up the deadhead once the water is back-pressured and charged. Once a pipeline is charged and the deadhead is running we can light up all the snow guns in between. That brings us to the next subject... snow guns.
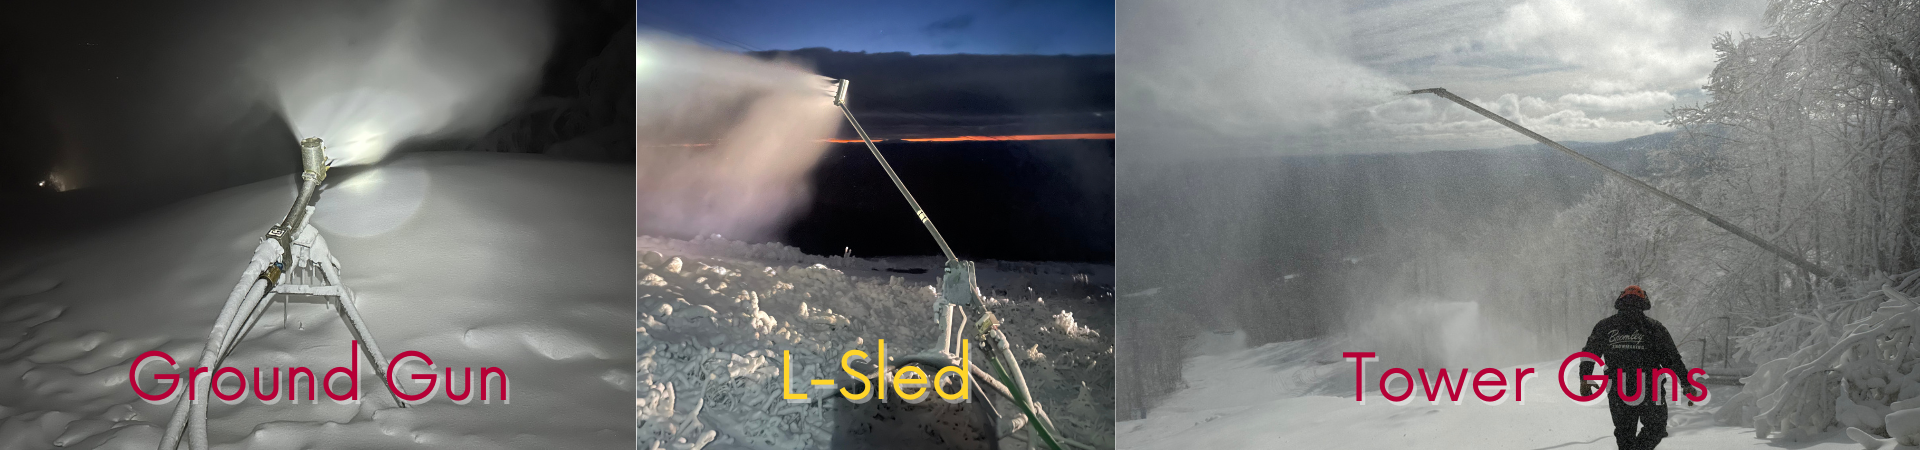
Bromley takes pride in being one of the most energy-efficient mountains in Vermont when it comes to making snow. As you can see, with all of the pumps and compressors this can get expensive... quickly. However, thanks to snow gun development over the years, the air-to-water ratio needed to operate these guns has become more and more optimal. Bromley has hundreds of snow guns scattered throughout the mountain. These range from tower guns (the long snow guns you see on the sides of trails) to L-sleds (mini-towers on sleds that we can move around), and ground guns (guns on tripods that we can move easily). Most of these guns have different water-flow settings that allow for the amount of water being pushed out of the gun to be adjusted according to the wet bulb temperatures and the likelihood of it freezing. As the output of water increases, the harder it is to freeze, so thus a colder wet bulb is needed. This is partially why in single-digit temperatures, we can make more snow than 2-3 days of marginal temperatures (20-26 degrees). The other reason why is that our snow yield is greater because more water particles are freezing and not melting upon impact with the ground.
In case you have noticed while skiing here, the wind typically comes from the West (your left as you reach the summit on the #1 Sun Mountain Express Quad). Taking this into account, most of our tower guns are positioned on skier’s right of the trails to ensure the wind is carrying the water particles out to the trail and not backward into the woods. Each trail is a little different with the size of the tower guns and the positioning of ground guns. On narrow trails like Run Around #1, it is critical that we use ground guns on that bottom half to ensure snow is landing in the areas where we need it. Through decades of trial-and-error, we’ve pretty much figured out the positioning of what snow guns we need on certain parts of trails (shoutout to Miguel who is the guru of knowing what goes where). An excellent example of gun flexibility is on Havoc. For the first few days we make snow on Havoc, we use the tower guns to get the skier’s right of the steep pitch. Given the limited space that those towers can cover, once we have piled up on skier’s right, we take ground guns and stretch them out to the edge of the piles. This allows for us to shoot down the “abyss” to cover skier’s left of the trail. This is why having a versatile fleet of tower guns, fan guns, L-sleds, and ground guns allows us to optimize where we are placing snow when making it.
When turning on a snow gun, the snowmaker needs to attach the air and water hoses to the correct entrance ports on the snow gun. They must then carefully open the air and water hydrants to ensure safe and proper pressurization of the snow gun. When shutting a snow gun off, the snowmaker needs to close the hydrants with care and then detach the water hose and air hose from the gun and hydrant. It is then required to “blow out” the water hose. This process occurs when you take the water hose (which still has water in it) and attach it to the air hydrant. One snowmaker then will slowly open the air hydrant while the other holds the end of the hose. As the high-pressure air is released from the hydrant it “blows out” the water from the hose, ensuring that the hose doesn’t freeze and become unusable for the next time it is needed at that snow gun.
When shutting the entire snowmaking system down the team works in the reverse order of firing up. The snowmakers will shut down all the guns in between the deadhead gun and the charging valve. Once it is just the dead-head gun running, a snowmaker will “isolate” the line. This is when the charging valve is shut, cutting off the water flow from the up-line to the pipeline that is charged. Once the pipeline is fully isolated, a snowmaker can close the hydrants for the deadhead gun and open the drain. At the end of each pipeline is a drain, to ensure we have properly pushed all the water out of the pipeline to avoid freezing. We repeat this process until it is only the up-line that is charged. We then can “dump the pumps” and drain the entire mountain back into the reservoir. During this time the pressurized air pipeline is also drained to ensure a safe air pressure in those pipes. And that is a brief overview of the methodology behind firing up, making snow, and shutting down the system.
One last key piece of information to know is that once you understand the water-flow to temperature bounds you start to see the quality of snow change. If you are flowing less water from a snow gun at a colder wet bulb temperature you are making “dryer snow.” This is because the smaller amount of water flowing allows for better freezing of the water particles. The opposite is also true, that when we increase the water flow at a higher wet bulb temperature, we get snow that is much “wetter.”
Finally let us quickly talk about our snowmakers... leading the charge is the manager, Matt Folts. He designs our plans and works with upper management to plan where and when we choose to make snow. Our nighttime supervisor is Greg Cathey who oversees the system in the dark hours of the night. The crews are split into night and day working 12-hour shifts. The shift schedules are: day crew 7 AM to 7 PM and night crew 7 PM to 7 AM. Each crew has 3-4 people covering those shifts along with 1 compressor house operator. It is this team that does maintenance and ensures that snowmaking is being done efficiently and safely. They are some of the best and most hardworking people I have had the honor of working with. Snowmaking truly is fun thanks to them.
Philosophy
I know that was an information overload above this section, but hopefully you have a better understanding of the complex nature of the snowmaking process. Given the time it takes to fire the system up, shut it down, and drain it, it makes it difficult to choose to make snow in short windows of good wet bulb temperatures. We like to create a base of wetter snow on trails that don’t have any snow on them. This allows us to produce a hard-frozen base layer that ensures as little melting as possible (because sometimes the ground warms and freezes from the bottom up). Once we’ve let the snow pile up and deemed it to have a sufficient amount of snow, we will shut the trail down and let the piles sit for a couple days. The reason why we let our piles sit is because of a process called “leaching.” This is when the water in the “wet snow” drains from the piles “drying” the snow out. If we were to push out the piles immediately after shutting down, it would create an ice layer on the surface that would be challenging to make enjoyable to ski on. The bottom layers of the piles however tend to stay wet enough to guarantee the base that will last most of the season. By allowing the piles to leach we establish the best quality surface we can for all of you to enjoy.
In the early season (November) our goal is to simply get something frozen up onto the hill. However, as the season progresses, it is smarter to make snow at colder temperatures than marginal ones. This is because it goes back to the “wet snow” “dry snow” concept mentioned above. Once Matt, our manager has estimated a good window for making snow, he consults upper management. They then devise a plan and figure out what trails would do best given our system capacity and wet bulb temperatures. Typically, the upper mountain is anywhere from 3-8 degrees colder than the base area. So, on nights when the dry bulb temperature on your phone might say 25 degrees, that is the base area temperature. It could be in the teens at the summit; not considering the wet bulb. At that point, the crews are assembled and the process begins.
We strategically choose what trails to make snow on and when. It is critical to have Upper Twister, Corkscrew, West Meadow, and Lower Boulevard open first. It also just so happens that Upper Twister and Corkscrew are two of our up-lines to the summit, so there’s little “charging” of pipelines needed. By starting on these trails, it ensures an easy, medium, and difficult terrain selection for skiers of all ability levels. We then tackle the west side starting with Run Around #1 and continuing downward depending on temperatures to, Upper Thruway, Run Around #2, Lower Twister, Spring Trail, Sunset Pass, Lower Thruway, and Crackerjack. Upper East Meadow and Lower East Meadow are often thrown in the mix to make the racecourse available. Our next priority is Chase-it, Ridge, and Yodeler which opens up the beginner terrain and access to the #10 Blue Ribbon Quad. We will then venture East to the notorious 4 P’s. The 4 P’s are Plaza, Lord’s Prayer, Pabst Panic, and Pabst Peril. Once that is done, we continue eastward and end the season with Havoc. We try and get snowmaking all completed by February 1st, however, given the weird winters we’ve had our snowmaking season has extended well into February. Whenever we must go back to trails and resurface due to melting events it puts trail expansions on delays. However, we would rather have good, safe trail coverage on our open terrain than have a bunch of trails open with barely any coverage. Further, by lapping back around when needed we ensure that our snow quality and surface is the best it can be for maximum enjoyment. That is the perks of snowmaking at a smaller mountain like Bromley, we have the ability and resources to resurface when and if needed.
Conclusion
 large.jpeg)
Recapping this entire article... snowmaking is quite the process and I have only really scratched the surface. I wanted to, however, give a quick shoutout to the grooming team. Snowmaking is the starting point but without our groomers, the trails would not get properly pushed out and evenly covered. In case you did not know, there is a ton of methodology in grooming as well, pushing snow from the sides of the trails back to the middle and covering up thin spots. I also want to give a shoutout to the lift maintenance team. Given the wind, it is sometimes difficult to avoid hitting the lifts with snow; especially because it is often where we need it most. The lift maintenance team gets out there and cleans off the chairs and haul ropes after we have made snow and ensure the safety of all its riders. So as you all can see, it truly is a “team” effort out there. The Mountain Operations here at Bromley, headed by Rick Goddard, is a world-class crew that works tirelessly to keep the skiing/riding going. It’s truly a pleasure and honor to work for these guys, many of them have decades of experience in the industry and at Bromley. If you ever see any Mountain Ops guys, give them a “thanks” and buy them a drink.
Shoutout to the 23/24 Team: Matt, Greg, Miguel, Charb, Mike, Phil, Fred, Josh, Cory, Ryan and Cam